Wednesday, September 14, 2011

python: pitfalls

http://zephyrfalcon.org/labs/python_pitfalls.html


5. Mutable default arguments


This one bites beginners over and over again. It's really a variant of #2, combined with unexpected behavior of default arguments. Consider this function:

>>> def popo(x=[]):
...     x.append(666)
...     print x
...     
>>> popo([1, 2, 3])
[1, 2, 3, 666]
>>> x = [1, 2]
>>> popo(x)
[1, 2, 666]
>>> x
[1, 2, 666]

This was expected. But now:

>>> popo()
[666]
>>> popo()
[666, 666]
>>> popo()
[666, 666, 666]

Maybe you expected that the output would be [666] in all cases... after all, when popo() is called without arguments, it takes [] as the default argument for x, right? Wrong. The default argument is bound *once*, when the function is *created*, not when it's called. (In other words, for a function f(x=[]), x is *not* bound whenever the function is called. x got bound to [] when we defined f, and that's it.) So if it's a mutable object, and it has changed, then the next function call will take this same list (which has different contents now) as its default argument.
Solution: This behavior can occasionally be useful. In general, just watch out for unwanted side effects.

Monday, September 12, 2011

prog: namespace

http://www.freenetpages.co.uk/hp/alan.gauld/tutname.htm

What is namespace?
The concept is pretty straightforward, a namespace is a space or region, within a program, where a name (variable, class etc) is valid. 


We actually use this idea in everyday life. Suppose you work in a big company and there is a colleague called Joe. In the accounts department there is another guy called Joe who you see occasionally but not often. In that case you refer to your colleague as "Joe" and the other one as "Joe in Accounts". You also have a colleague called Susan and there is another Susan in Engineering with whom you work closely. When referring to them you might say "Our Susan" or "Susan from Engineering". Do you see how you use the department name as a qualifier? That's what namespaces do in a program, they tell both programmers and the translator which of several identical names is being referred to.


##### module first.py #########
spam = 42
def print42(): print spam
###############################
##### module second.py ########
from first import *  # import all names from first

spam = 101   # create spam variable, hiding first's version
print42()    # what gets printed? 42 or 101?

################################
If you thought it would print 101 then you were wrong. A name is simply a label used to reference an object. Now in the first module the name print42 refers to the function object defined in the module. So although we imported the name into our module we did not actually import the function which still refers to its own version of spam. Thus when we created our new spam variable it has no effect on the function referred to by print42.


Friday, September 9, 2011

prog: A* c = new C( )

-

prog: OOP

http://www.freenetpages.co.uk/hp/alan.gauld/tutclass.htm

Data hiding
Encapsulation
Message passing metaphor
self: this parameter is filled in by the interpreter at run-time, not by the programmer.

polymorphism: If we have two objects of different classes but which support the same set of messages but with their own corresponding methods then we can collect these objects together and treat them identically in our program but the objects will behave differently. This ability to behave differently to the same input messages is known as.. 
Polymorphism: the ability to send the same message to several different types of object and each behaves in its own particular way in response.


class BalanceError(Exception): 
      value = "Sorry you only have $%6.2f in your account"

class BankAccount:
    def __init__(self, initialAmount):
       self.balance = initialAmount
       print "Account created with balance %5.2f" % self.balance

    def deposit(self, amount):
       self.balance = self.balance + amount

    def withdraw(self, amount):
       if self.balance >= amount:
          self.balance = self.balance - amount
       else:
          raise BalanceError, BalanceError.value % self.balance

    def checkBalance(self):
       return self.balance
       
    def transfer(self, amount, account):
       try: 
          self.withdraw(amount)
          account.deposit(amount)
       except BalanceError:
          print BalanceError.value
Notice that we didn't use self when defining the value in BalanceError, that's because value is a shared attribute across all instances, it is defined at the class level and known as a class variable. 


- Class variable and Instance/Object variable.


- It doesn't save a lot of code but it does mean we only have one method definition to test and maintain instead of three identical methods. This type of programming where we introduce a superclass with shared functionality is sometimes called mixin programming and the minimal class is called a mixin class. It is a common outcome of this style that the final class definitions have little or no body but a long list of inherited classes, just as we see here.


Wednesday, September 7, 2011

comp: stack and heap

http://www.maxi-pedia.com/what+is+heap+and+stack

Stack is a section of memory and its associated registers 


  • Both the stack and the heap are memory areas allocated from the underlying operating system (often virtual memory that are mapped to physical memory on demand).
  • In a multi-threaded environment each thread will have it's own completely independent stack but they will share the heap. Concurrent access has to be controlled on the heap and is not possible on the stack.

prog: pure virtual function and abstract class

http://en.wikipedia.org/wiki/Virtual_function


pure virtual function or pure virtual method is a virtual function that is required to be implemented by a derived class, if that class is not abstract. Classes containing pure virtual methods are termed "abstract"; they cannot be instantiated directly, and a subclass of an abstract class can only be instantiated directly, if all inherited pure virtual methods have been implemented by that class or a parent class. Pure virtual methods typically have a declaration (signature) and no definition (implementation).


prog: Virtual function

http://www.cplusplus.com/forum/beginner/13885/


A function should be declared virtual [in the base class] if you ever intend to allow derived classes to reimplement the function AND you intend to call the function through a base class pointer/reference.


struct Base
{
    virtual void do_something() = 0;
};


struct Derived1 : public Base
{
    void do_something()
    {
         cout << "I'm doing something";
    }
};

struct Derived2 : public Base
{
    void do_something()
    {
         cout << "I'm doing something else";
    }
};

int main()
{
    Base *pBase = new Derived1;
    pBase->do_something();//does something
    delete pBase;
    pBase = new Derived2;
    pBase->do_something();//does something else
    delete pBase;
    return 0;
}

Friday, September 2, 2011

references: Python, C/C++

http://www.cplusplus.com/reference/stl/

http://eli.thegreenplace.net/2010/09/18/python-internals-symbol-tables-part-1/


Python: Notes

- For efficiency reasons, each module is only imported once per interpreter session. Therefore, if you change your modules, you must restart the interpreter – or, if it’s just one module you want to test interactively, use reload(), e.g. reload(modulename).

- The modification time of the version of spam.py used to create spam.pyc is recorded in spam.pyc, and the .pyc file is ignored if these don’t match.

- A program doesn’t run any faster when it is read from a .pyc or .pyo file than when it is read from a .py file; the only thing that’s faster about .pyc or .pyo files is the speed with which they are loaded.

opcode

http://en.wikipedia.org/wiki/Opcode

Compiler

http://en.wikipedia.org/wiki/Compiler

STL Containers

 http://www.cplusplus.com/reference/stl/

Thursday, September 1, 2011

prog: language translator

 such as a compiler or interpreter

Python: Symbol table

http://eli.thegreenplace.net/2010/09/18/python-internals-symbol-tables-part-1/

In computer science, a symbol table is a data structure used by a language translator such as a compiler or interpreter, where each identifier in a program’s source code is associated with information relating to its declaration or appearance in the source, such as its type, scope level and sometimes its location.


A high-level view of the front-end of CPython is:
  1. Parse source code into a parse tree
  2. Transform parse tree into an Abstract Syntax Tree
  3. Transform AST into a Control Flow Graph
  4. Emit bytecode based on the Control Flow Graph
 Symbol tables are generated by the compiler from AST just before bytecode is generated. The symbol table is responsible for calculating the scope of every identifier in the code. symtable provides an interface to examine these tables.

prog: bytecode

http://en.wikipedia.org/wiki/Bytecode

Python source code is compiled into bytecode, the internal representation of a Python program in the CPython interpreter. The bytecode is also cached in .pyc and .pyo files so that executing the same file is faster the second time (recompilation from source to bytecode can be avoided). This “intermediate language” is said to run on a virtual machine that executes the machine code corresponding to each bytecode. Do note that bytecodes are not expected to work between different Python virtual machines, nor to be stable between Python releases.
(http://docs.python.org/glossary.html#term-bytecode)

Python: Coding style

http://www.python.org/dev/peps/pep-0008/

Wednesday, August 31, 2011

C++: Unicode

Character sets
http://www.microsoft.com/typography/unicode/cs.htm


Support for Unicode
http://msdn.microsoft.com/en-us/library/2dax2h36.aspx

Unicode is a specification for supporting all character sets, including character sets that cannot be represented in a single byte. If you are programming for an international market, consider using either Unicode or multibyte character sets (MBCSs) or enabling your program so you can build it for either by changing a switch.

A wide character is a 2-byte multilingual character code. Most characters used in modern computing worldwide, including technical symbols and special publishing characters, can be represented according to the Unicode specification as a wide character. Characters that cannot be represented in 1 wide character can be represented in a Unicode pair with Unicode's surrogate feature. Because each wide character is always represented in a fixed size of 16 bits, using wide characters simplifies programming with international character sets.

Generally, wide characters take more space in memory than multibyte characters but are faster to process. In addition, only one locale can be represented at a time in multibyte encoding, whereas all character sets in the world are represented simultaneously by the Unicode representation.


Unicode Programming Summary
http://msdn.microsoft.com/en-us/library/dybsewaf%28VS.80%29.aspx

With _UNICODE defined, _T translates the literal string to the L-prefixed form; otherwise, _T translates the string without the L prefix.


Multibyte Character Sets
http://msdn.microsoft.com/en-us/library/5z097dxa.aspx


Windows ANSI character set

C++ : Literals

http://msdn.microsoft.com/en-us/library/c70dax92%28v=vs.80%29.aspx

Invariant program elements are called "literals" or "constants." The terms "literal" and "constant" are used interchangeably here. Literals fall into four major categories: integer, character, floating-point, and string literals.

Friday, July 22, 2011

C++ - MD and MT compile option


Simple explanation


Microsoft Visual C++ Static and Dynamic Libraries


http://shitohichiumaya.blogspot.com/2009/10/visual-c-md-and-mt-compile-option.html

- MT: Multi-threaded static library. This is good for distribution a whole application package, since everything is statically linked and there is no dependency to the environment.

- MD: Multi-threaded Dynamic link library. If you distribute some library instead of a whole application, dynamically linked runtime is better since, some part of the program uses one version of runtime, and the other uses different version,this causes a trouble. For example, 'new'ed some memory at one version of runtime, and 'delete'd by other version of runtime could be a trouble.


http://dev.mobixo.net/2008/03/use-mtd-or-mdd.html


/MD
causes application to use the multithread- and DLL-specific version of the run-time library. Applications compiled with this option are linked to MSVCRT.lib. This library provides a layer of code that allows the linker to resolve external references. The actual working code is contained in MSVCR80.DLL, which must be available at run time to applications linked with MSVCRT.lib.

/MT

causes your application to use the multithread, static version of the run-time library. Defines _MT and causes the compiler to place the library name LIBCMT.lib into the .obj file so that the linker will use LIBCMT.lib to resolve external symbols.

C++ - The #include Directive

http://msdn.microsoft.com/en-us/library/36k2cdd4(v=vs.80).aspx


#include  "path-spec"
#include  <path-spec>

Syntax FormAction
Quoted form
This form instructs the preprocessor to look for include files in the same directory of the file that contains the #include statement, and then in the directories of any files that include (#include) that file. The preprocessor then searches along the path specified by the /I compiler option, then along paths specified by the INCLUDE environment variable.
Angle-bracket form
This form instructs the preprocessor to search for include files first along the path specified by the /I compiler option, then, when compiling from the command line, along the path specified by the INCLUDE environment variable.

web terminologies

AJAX - http://en.wikipedia.org/wiki/Ajax_(programming)
Document Object Model (DOM)
The Document Object Model (DOM) is a cross-platform andlanguage-independent convention for representing and interacting with objects in HTMLXHTML and XML documents.
http://www.quirksmode.org/dom/intro.html

Difference Between Unicode and ASCII,

http://www.differencebetween.com/difference-between-unicode-and-ascii/

Thursday, July 21, 2011

Sencha - loading an image

- set an ID of Panel (e.g., PreviewPaneAI)
- set an ID of a sub-panel for an image (e.g., assetImageContainerAI),
and set a height properly.
- Send an image properly to a client from Phython,

- Use the following code for AIuserProject.js.
updatePreview: function(node) {
        var str='<img src="{img}" style="float: right;" height="100%" />';
        str = str.replace("{img}",node.attributes.thumbnailURL);
        panel = Ext.getCmp('assetImageContainerAI');
        panel.body.update(str);
}

Tuesday, July 19, 2011

Sencha - combo box

After creating a combo box, we have to


- Set the url. 
- Set id and autoRef.
- minChars: 0,
- displayField: 'filename',  (which is one of components of the fileStore.)


For 'load project preset',
we need to set autoRef: fileLoadForm2 of the FormPanel, 
and autoRef: loadProjectPresetButton2 of the Button, 
and then implement as follows (MainPanel.js)
this.loadProjectPresetButton2.on('click', this.onSubmitClick.createCallback(this, this.fileLoadForm2, false));
this.loadProjectPresetButton2.on('click', this.delayRefreshAllTrees, this );

In addition, Tree.py 
if "fileSelectCombobox2" in e.__dict__:
self.loadTree(os.path.join(BASE_PROJECT_FOLDERS[0],e.fileSelectCombobox2)+PROJECTFILE_INDICATOR)


// Upload from Vizard to Browser of saved trees.//
socket.onevent('saved_trees', function(e){
//})


# Strip ?_dc request
#page_request = page_request.split('?_dc')[0]

Sencha - textfield


First, make a Textfield and a Button under a FormPanel including a FieldSet (which is for a layout).
FormPanel should have an autoRef (e.g., fileSaveForm) for this code (MainPanel.js)

The 'fileSaveButton' is an autoRef of the 'Save Project Preset' button.
'fileSaveField' is an autoRef of the textfield.


this.fileSaveButton.on('click', this.onSubmitClick.createCallback(this, this.fileSaveForm, false));
this.fileSaveButton.on('click', this.delayRefreshAllTrees, this);

Finally, when a user clicks the button, the fileSaveForm is invoked
and somehow the textfield under the formpanel is invoked as well.
Then, a text message (written by the user) is transferred to python scripts using a callback function.
mk:@MSITStore:C:\Program%20Files%20(x86)\WorldViz\Vizard4\help\Vizard.chm::/vizhtml_collecting_form_data.htm


On the other hand, when you display something from python to Sencha,  we can call data as follows. 
Of course, somehow we need to register JSON.
vizhtml.registerCode("check-nodes.json",items,isFile=True)

    initComponent: function() {
            this.on('click', this.onClick, this);
    },
    onClick: function(node){
        if (node.isLeaf()) {
            this.updatePreview(node);
        }
    },
    updatePreview: function(node) {
        Ext.getCmp('fileSaveField').setValue(node.attributes.file_location);
    }

Monday, July 18, 2011

Python - Get IP address of server

# Get IP address of server
LOCAL_SERVER_IP = [ip for ip in socket.gethostbyname_ex(socket.gethostname())[2] if not ip.startswith("127.")][-1]
if not LOCAL_SERVER_IP:
    LOCAL_SERVER_IP = 'localhost'
treeutils.LOCAL_SERVER_IP = LOCAL_SERVER_IP # Tell treeutils the server address


http://www.velocityreviews.com/forums/t339971-get-the-ip-address-of-a-host.html

Wednesday, July 6, 2011

Javascript - Sencha Tree

Learning EXT Designer (Sencha)
http://www.alib.spb.ru/download/web/learning_extjs.pdf

Examples.
http://dev.sencha.com/deploy/ext-4.0.0/examples/ 

Getting Ext.Elements

http://docs.sencha.com/core/manual/content/element.html


Simple tutorial about EXT Designer.
http://aboutfrontend.com/extjs/ext-designer-tutorial-for-a-developer/

Tutorial
http://www.sencha.com/learn/Tutorials

Intro and APIs
http://docs.sencha.com/ext-js/4-0/


http://docs.sencha.com/ext-js/4-0/#/guide/tree


http://newsite.sencha.com/learn/Tutorial:Extending_Ext_for_Newbies


xtype
http://www.sencha.com/learn/Tutorial:Xtype_defined

Tree

To display hierarchical data in a collapsible list, you use a TreePanel container. A TreePanel contains a
root node and any number of child nodes. You can build a static tree, or use a TreeLoader to load data
into the tree asynchronously.
http://www.sencha.com/forum/showthread.php?98442-TreePanel-with-tri-state-checkboxes


Availability via ComponentMgr
Every component in Ext gets registered with the ComponentMgr on creation, so you can retrieve any component at any time simply by calling Ext.getCmp('id').


http://www.sencha.com/forum/showthread.php?123644-CodeMirror-and-Sencha-%28ExtJs%29


How to uncheck all tree node in Ext.tree.TreePanel

http://stackoverflow.com/questions/4450360/how-to-uncheck-all-tree-node-in-ext-tree-treepanel

FireBug
http://getfirebug.com/

Global var for js
http://stackoverflow.com/questions/944273/how-to-declare-a-global-variable-in-a-js-file


Misc
http://www.sencha.com/forum/showthread.php?12888-solved-programatically-unchecking-checked-tree-nodes&p=62845#post62845
http://docs.sencha.com/ext-js/4-0/#/api/Ext.form.field.Checkbox-cfg-uncheckedValue
http://docs.sencha.com/ext-js/4-0/#/api/Ext.tree.Panel-event-checkchange


multiple tree root nodes

http://www.sencha.com/forum/showthread.php?39142-multiple-tree-root-nodes


EXT JS

-

Javascript
JavaScript is an object-based language. Every data item is an object. Numbers, strings, dates, and Booleans (true or false values) are all objects. JavaScript variables reference the objects we assign to them. In JavaScript, functions are also objects, and may be assigned to variables and passed as parameters just the same as other objects. A function declaration is a literal in just the same way that a quoted string is a literal.

var myVariable = "A string literal";
alert(myVariable);
myVariable = function() {
         alert("Executing the function");
};
myVariable();

This concept is central to your understanding of much of what follows. Functions will be passed as parameters into Ext JS methods to be called by Ext JS to handle user interface events or network communication (AJAX) events.

It is important to remember that when a function reference is passed, it's only a pointer to a function object. If that function was a member method of an object, then this information is not included. If the function is to be executed as a member method of an object, then that information must be included when passing the function. This is the concept of scope, which will be very important in later chapters.

Three Main Files..
- ext-all.css: A stylesheet file that controls the look and feel of Ext JS
widgets. This file must always be included as-is, with no modifications. Any
changes to the CSS in this file would break future upgrades. If we decide that
the look and feel of Ext JS needs to be adjusted, another stylesheet containing
the overrides should be included after the ext-all.css file.
ext-base.js: This file provides the core functionality of Ext JS. It's the
foundation upon which Ext JS builds its capabilities, and provides the
interface to the browser environment. This is the file that we would change
if we wanted to use another library, such as jQuery, along with Ext JS.
ext-all-debug.js/ext-all.js: All of the widgets live in this file. The
debug version should always be used during development, and then
swapped out for the non-debug version for production.

The Ext.onReady function accepts a function as its first parameter. It will call that
function when the page has fully loaded, and the HTML document is ready to be
manipulated. If you pass a function to Ext.onReady when the document is already
fully initialized, it will be called immediately.


Widgets and classes
Ext JS has many "widgets". These are implemented as classes. These include components such as a message box, grid, window, tree, form, and pretty much everything else that serves a particular user interface function. These will mostly be referred to as 'Components'. There are also data, utility, and
other base classes to aid with development. Methods like onReady are part of the core functions. We only refer to classes that provide a specific user interface role as "widgets"—like the grid that is used to present tabular data to the user.

Ext.get

Ext JS is able to work so well, because it has a foundation that provides access to the DOM, and to many functions that allow manipulation of the DOM. These are part of the Ext Core library. Of these functions, get is one of the most used.
         Var myDiv = Ext.get('my_id');
This gives us access to an element in the document with the ID, my_id by wrapping it in an Ext.Element object which provides cross-browser methods to work with DOM elements.


xtype:
Defines which type of Ext JS component will be used: text, date, number, or any of the many others. This could even be a grid or some other type of Ext JS component.
Be aware that the default xtype is a panel. Any {…} structure with no xtype property, as an element in an items config, results in a panel at that position.

{
        xtype: 'textfield',
        fieldLabel: 'Title',
        name: 'title'
}

name
The name config is just the same as its HTML counterpart and will be used as the parameter name when sending form data to the server.
 The names of most of the config options for Ext components match their counterparts in HTML. This is because Ext was created by web developers, for web developers.

Validation
There are many more configuration options, specific to each specialized Ext JS Component class. To easily find what options are available in the online documentation, use the Hide inherited members button at the top right. This will hide config options from the base classes of the Component's heritage, and only show you options from the Component you are interested in:


Thursday, June 30, 2011

How to use getElementById

From.. 
http://www.javascript-coder.com/javascript-form/getelementbyid-form.phtml
http://www.tizag.com/javascriptT/javascript-getelementbyid.php


Sample code
Download the sample code here: getelementbyid-form-sample.zip
There are many ways of accessing form elements, of which the easiest is by using the cross-browser W3C DOM document.getElementById() method. Before we learn more about this method, it would be useful to know something about the Document Object Model (DOM), the concept of HTML nodes or elements, and the concept of containers.

Each time you load an HTML page, the web browser generates an internal representation of the page in the form of an inverted tree structure. Let us look at a simple form. We will use this form later to demonstrate the use of the getElementById method.
<form name ="subscribe" id="subscribe_frm" action="#">
Your Name: <input type="text" name="name" id="txt_name" />
Your Email: <input type="text" name="email" id="txt_email" />
<input type="button" name="submit" value="Submit"
onclick="processFormData();" />
</form>
There are elements such as <input/> and containers like <form> </form> Each element can have attributes associated with it, such as:
<input type="text" name="name" id="txt_name">
Here, the <input/> element has three attributes: type, name and id. The id attribute uniquely identifies this particular element.

Accessing Form Elements using getElementById

In order to access the form element, we can use the method getElementById() like this:
var name_element = document.getElementById('txt_name');
The getElementById() call returns the input element object with ID ‘txt_name’ . Once we have the object, we can get the properties and call the methods of the object. For example, to get the value of the input element, get the value attribute.
var name = name_element.value;
Similarly, it is possible to access the <form> element:
var frm_element = document.getElementById ('subscribe_frm');

Example: access the form and input elements

See the demo.
In this demo, we toggle the visibility of the form. This is done by accessing the form element <form> which we have seen above and setting its display property as shown in the code below:
var frm_element = document.getElementById('subscribe_frm');
var vis = frm_element.style;
if (vis.display=='' || vis.display=='none')
{
    vis.display = 'block';
}
else
{
    vis.display = 'none';
}

Example: Input validation

The code below makes sure that the field is not empty.
First, we trim out any leading and trailing blank space.
function trim (str)
{
     return str.replace (/^\s+|\s+$/g, '');
}
The code below validates the txt_name field.
var name_element = document.getElementById (‘txt_name’);
if (trim(name_element.value) == '')
{
   alert ('Please enter your name');
}

Checking for getElementById support

All modern browsers support getElementById() method. However if you are to support very old browsers, use the following function:
function getElement (id)
{
   if (document.getElementById)
   {
      return document.getElementById(id);
   }
   else if (document.all)
   {
      return window.document.all[id];
   }
   else if (document.layers)
   {
      return window.document.layers[id];
   }
}

Other Cross-browser ways of accessing form element objects

There are two other cross-browser ways of accessing form elements: document.getElementsByTagName and document.getElementsByName.

Using the document.getElementsByTagName Method

This method takes in as argument the name of a tag (element) and returns an array of all matching tags (elements) found in the document.
In our form example, if we had to get a reference to all the <input> elements, we could use the following code:
var inputs = document.getElementsByTagName('input');
The variable inputs is a reference to an array of all <input> elements including: <input type=”button”>
getelementbyid example 2
What if we only wanted to access <input> elements with the type attribute as text? We could do it in the following way:
var inputs = document.getElementsByTagName("input");
var message =
   "The form has the following input elements with the 'type' attribute = 'text': \n\n";
for (var i=0; i < inputs.length; i++)
{
   if (inputs[i].getAttribute('type') == 'text')
   {
      message += inputs[i].tagName +
      " element with the 'name' attribute = '";
      message += inputs[i].getAttribute('name') + "'\n";
   }
}
alert(message);
This time, the elements retrieved do not include the element: <input type=”button”>.
getelementbyid example 3

Using the document.getElementsByName Method

This method takes in as argument the name attribute value of elements to be retrieved and returns a collection of desired matching elements.
In the code snippet below, let us say we need to get a reference to the <select> element with the name attribute mail_format.
<select name="mail_format" id="slt_mail_format">
<option value="TEXT">Plain Text</option>
<option value="HTML">HTML</option>
</select>
We could access the desired element in this way:
var mail_format_elements = document.getElementsByName('mail_format');
getelementbyid example 4.

Javascript

http://homepage.ntlworld.com/kayseycarvey/


<HTML>
<HEAD>
<TITLE>A First Script</TITLE>
</HEAD>
<BODY>
    <SCRIPT LANGUAGE = JavaScript>
        document.write("Hello World")
    </SCRIPT>
</BODY>
</HTML>

- Document is part of something called the Document Object Model. Document refers to all the text and HTML elements between the two BODY tags. And that includes any attributes inside the BODY tag itself. Like BGCOLOR.

- Write( ) is a method of Document. A method is a bit of code that actually does something. As opposed to a Property, which IS something. Methods are usually Verbs, and Properties usually Nouns. The Write( ) method writes text (and numbers as well) between the two BODY tags on your page. So the whole line reads "Write the text Hello World between the two BODY tags of the web page."

- At the moment, we have our script between the two BODY tags. And it works perfectly well here. It's quite happy where it is. However, SCRIPTS are best kept in the HEAD section of your HTML. This is because any code in the HEAD section will be dealt with first by the browser. And besides, it's neater up there. You're not cluttering up your HTML code with lots of JavaScript.

The Pop-up message box (Alert boxes)

<HTML>
<HEAD>
<TITLE>A First Script</TITLE>
    <SCRIPT LANGUAGE = JavaScript>
        document.write("hello World")
    </SCRIPT>
</HEAD>
<BODY>
<INPUT TYPE = Button VALUE = "Click Me" OnClick = "alert('That was not a proper email address')">

</BODY>
</HTML>

Properties
  • bgColor
  • fgColor
  • title
  • location
  • images
  • forms
Methods
  • open()
  • close()
  • write()
  • writeln() 

Vizard - vizhtml

Form Definition

To define forms, you must use the HTML <form> tag. All input elements defined within the <form> tag will be included in the data of the form submission event.

A couple important things to note when defining your HTML form:

  1. You must set the method attribute of the form to "post"
  2. If your HTML is specified in an external file/URL, as opposed to embedded in your script, you must set the action attribute to the vizhtml web server (e.g. "http://localhost:8080/vizhtml_form/")
vizhtml.displayCode(html)

# Wait for form submission
d = yield vizhtml.waitFormSubmit()
# Get data from form
first = d.first_name
last = d.last_name

viztask.schedule( FormTask() )


HTML forms in a remote browser

In order to collect data from an HTML form displayed in a remote browser, a page containing HTML content needs to be registered with vizhtml's local HTTP server. A form submission event will get triggered once a form is submitted and data can be collected using a task or callback function. 

vizhtml.registerCode('form_submit',code)

def HandleForm(e):
    print e.first_name,e.last_name
vizhtml.onFormSubmit(HandleForm)  


Local HTTP server and URLs

- All the communication that occurs between Vizard and a browser or embedded HTML page, whether through forms or WebSocket messages, goes through a local HTTP server built into vizhtml. The commands listed in previous sections to display HTML in the embedded window and register HTML with the local HTTP server automatically start the server.
- The base URL of vizhtml's HTTP server is the default server port (8080) affixed to the computer name or IP address of the machine. The full URL of a page on the server is a combination of the base URL of the server + /vizhtml/ + the page URL.


Collecting form data

- When an HTML form in a remote browser or embedded HTML window is submitted, a vizhtml.FORM_SUBMIT_EVENT is generated. The event can be handled using either a task or callback function.

vizhtml.waitFormSubmit()        Waits until a form submit event occurs. The yielded command returns a viz.Data object that holds the form data.

vizhtml.onFormSubmit(func,
*args,
**kw)
   Registers a callback function for a form submission event:

func: The function being registered. An event object e, holding form data, will be passed to this callback function.

*args: Optional arguments to pass to the registered function.

**kw: Optional keyword arguments to pass to the registered function.


WebSocket communication

- Real time bidirectional communication between Vizard and a web browser is supported using WebSockets. You can send and receive messages and find out when socket connections open or close. On the server (Vizard) side, the vizhtml module provides Vizard commands for sending messages and handling message and connection events. Similar functionality is provided on the client (browser) side using JavaScript functions through vizhtml's JavaScript library.

Wednesday, June 29, 2011

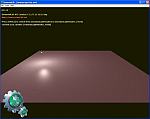
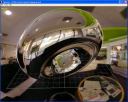
GLSL - Introduction - Related webpages

(Credit to the following page.)
http://loger1000.springnote.com/pages/3687031


 opengl.org 의 shading language

http://www.opengl.org/code/category/C20


The art of texturing Using the OpenGL Shading Language
  1. home : http://www.ozone3d.net/tutorials/glsl_texturing.php
    1.  tutorial : http://www.ozone3d.net/tutorials/index_glsl.php

  Fog with GLSL
    Fog implementation using GLSL - Use of gl_FogFragCoord, gl_FragCoord, gl_FogCoord and gl_Fog variables.

  How to bypass a Catalyst 7.11/7.12 GLSL Bug
    This article shows a workaround of a GLSL bug present in the Catalyst drivers 7.11 and 7.12.

  Mesh Deformers
    Two examples of mesh deformers using the GPU: surface deformer and mesh twister.

  The Art of Texturing using the GLSL
    This tutorial shows the common techniques of texturing and their implementation with GLSL (simple and multtexturing, sphere mapping, dual paraboloid mapping, cube mapping, texture warping, projective texture mapping).

  Vertex Displacement Mapping
    Explanation of the vertex displacement mapping technique to deform a mesh using a texture look up from a vertex shader.

  Normal-Map Compression
    The problem of normal-map (or bump-map) compression and how to solve it (renormalization - swizzled-DXT5 - ATI 3Dc).

  Lighting in GLSL - Phong Model
    This article presents the Phong lighting model and its implementation in GLSL for point and spot lights.

  The Mandelbrot Set: Colors of Infinity
    Theory and implementation on GPU with GLSL of Mandelbrot fractal rendering. Introduction to GPGPU.

  Image Filtering
    Image filtering and GLSL filters implementation (convolution kernels).

  Ambient Occlusion Lighting
    Présentation of ambient occlusion lighting technique. Occlusion-maps creation. Ambient occlusion GLSL shader.

  Bump Mapping
    Bump mapping implementation using GLSL shader. Lighting equations. Tangent space.

  Normal-maps
    Presentation and creation of normal-maps (or bump-maps).

  S3TC Texture Compression
    Texture compression (S3TC - DXT1/5) and how use it in Demoniak3D.

  Introduction to GLSL
    This tutorial presents the basis about GLSL shading language. GLSL shader integration into Demoniak3D.

2. demo : http://www.ozone3d.net/demos_projects/old_building.php#downloads

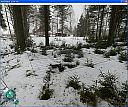
[+] Toon Snow
 
Merry Christmas with cel-shading and particles.

Executable: [ YES ]
Code Source: [ YES ]

Features:
- GLSL Cel-Shading
- OpenGL 1.5
- Particles

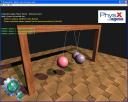
[+] Ageia PhysX Pendulum
 
Demo showing how to use the Ageia PhysX engine 'distance joints'.

Executable: [ YES ]
Code Source: [ YES ]

Features:
- Ageia PhysX functions
- LUA
- Mesh Picking
- OpenGL 1.3
- Shadow-volume

[+] Spiral Galaxy
 
Simulation of a spiral galaxy.

Executable: [ YES ]
Code Source: [ YES ]

Features:
- LUA
- vertex pool

[+] High Resolution Skyboxes
 
DemoPack of high resolution skyboxes.

Executable: [ YES ]
Code Source: [ YES ]

Features:
- Skybox 2k and 4k.

[+] Kool Fire
 
Demo of a small fire with smoke...

Executable: [ YES ]
Code Source: [ YES ]

Features:
- GLSL
- OpenGL 1.5
- Particles
- LUA
- Sound

[+] 3DGurukul Models DemoPack
 
Set of Demoniak3D demos showing 3DGurukul's free models.

Executable: [ NO ]
Code Source: [ YES ]


[+] PimPim's Siu Nim Tao
 
Demoniak3D Demo - Character animation and toon shader.

Executable: [ YES ]
Code Source: [ YES ]

Features:
- GLSL
- OpenGL 1.5
- Character Animation using keyframes


[+] Chromatic Aberration
 
Demo showing a reflexion / refraction shader with light dispersion.

Executable: [ YES ]
Source Code: [ YES ]

Features:
- GLSL
- OpenGL 1.5
- Gloss map
- Cube Map
- Reflection / Refraction gpu shader


[+] Mandelbrot Fractal
 
Demo showing Mandelbrot fractal generation using GPGPU (General Programming on GPU) techniques.

Executable: [ NO ]
Source Code: [ YES ]

Features:
- LUA
- GLSL
- FBO
- GPGPU concepts
- OpenGL 1.5


[+] Merry Christmas
 
The last demo of the year 2005 and the first one of 2006! Ambient occlusion and bump mapping, snow and merry christmas & happy new year!

Executable: [ NO ]
Source Code: [ YES ]

Features:
- LUA
- GLSL Ambient Occlusion Lighting Bump Mapping
- Particle System
- OpenGL 1.5


[+] Static Ambient Occlusion
 
Demo using an Ambient Occlusion Lighting and bump mapping shader, a water reflexion shader and point_sprite particles.

Executable: [ YES ]
Source Code: [ YES ]

Features:
- LUA
- GLSL Ambient Occlusion Lighting
- GLSL Bump Mapping
- Particle System (point_sprite mode)
- water reflexion shader
- OpenGL 1.5


[+] Lost Church
 
Demo using shadow volumes, particle system, bump mapping shaders. Shows how to setup the basis of a FPS game (First Person Shooter).

Executable: [ NON ]
Source Code: [ OUI ]

Features:
- LUA
- Stencil Shadow Volumes
- Sound
- Particle System
- GLSL Bump Mapping
- OpenGL 1.5


[+] Suffocate Benchmark
 
Benchmark using shadow volumes, particle system, and synchronized gfx/musik.

Executable: [ YES ]
Source Code: [ YES ]

Features:
- LUA
- Stencil Shadow Volumes
- Sound
- Particle System
- OpenGL 1.2


[+] Private Museum
 
Demo using shadow volumes and dynamic attenuated lights.

Executable: [ YES ]
Source Code: [ YES ]

Features:
- Stencil Shadow Volumes
- Attenuated lights
- OpenGL 1.2


[+] Water Reflexion
 
Demo exploiting a water reflexion shader.

Executable: [ YES ]
Source Code: [ YES ]

Features:
- GLSL
- OpenGL 1.5


[+] Buggy
 
Demo showing the use of opacity-maps in order to get partial-reflexions.

Executable: [ YES ]
Source Code: [ YES ]

Features:
- OpenGL 1.3
- spherical mapping
- texture reflexion
- VBO
- dynamic lighting


[+] IceFire
 
Particle system demo.

Executable: [ YES ]
Source Code: [ YES ]

Features:
- Particle System
- OpenGL 1.2


[+] Djizoes - Second Thoughts
 
'Second Thoughts' sound track demo of Djizoes group.

Executable: [ YES ]
Source Code: [ YES ]

Features:
- Sound
- Env sphere mapping
- OpenGL 1.2


[+] Parallax Bump Mapping
 
Demo showing a parallax bump mapping shader.

Executable: [ YES ]
Source Code: [ YES ]

Features:
- parallax bump mapping shader
- OpenGL 1.5
 OpenGL Shading Language course
  1. home : OpenGL Shading Language course